Materials Used:
- Stamps: "happy birthday" from easy events
- Other: owl punch, cardstock, happy birthday embossing folder, ribbon, thin black marker, googly eyes
Minion Tutorial:
Here is what you will need for each minion - each card has two.
Owl punch pieces: 2 black owls, 1 yellow owl, 2 blue owl vests, 2 black large eyes.
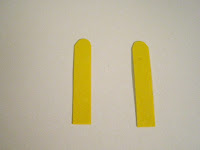
Other pieces: 1 black strip (1 1/4in x 1/4in), 2 yellow strips (1 1/4in x 1/4in) 2 googly eyes
1.) Cut off the ears and feet of the yellow owl.
2.) Cut of the top of the first blue vest and the sides of the second blue vest (about 1/8in thick).
3.) Attach them on to the body to make the overalls and cut off the access overall straps if needed.

4.) Cut off the bottom of the black owl and attach to the back of the body.
5.) Round out both corners on the black strip.
6.) Stick two googly eyes to the large black owl eyes, attach to the black strip, and attach to the body.
7.) Round out the corner of one end of each of the yellow stripes.
8.) Cut off the feet of the second black owl, making sure to leave some black on the ends. Attach them to the rounded ends of the yellow strips.
10.) To make the other minion, use the same steps as above and only glue on one eye instead of two. It should look like this:
11.) Once the minions are attached to the card, add a mouth and some hair.
And your done! They are a little putsy, but if you are making a bunch of cards at the same time and make all of the pieces for each step at once it goes a lot fast. Enjoy :)


Had an awesome time with your minion workshop this week! Mom loved the card :)
ReplyDeleteThanks for all of your help!! Glad she liked it :) I have another one for her...I'll keep you posted!
ReplyDeleteWhat a fun way to start off a Monday...this card made me smile big time!
ReplyDeleteGreat pics/tutorial! Thanks for the referral link too :) Have you seen the new purple minion: http://bit.ly/1dTPUVs
ReplyDeleteThanks for tutorail. Love the minion.
ReplyDeleteI've made two cards based on your tutorial. Thanks so much for the simple and fun project. You've helped bring smiles to a few kids faces. Thanks!
ReplyDeleteHi Trish! I've just made a card using your tutorial for these little guys - the best one around I think! Thank you so much, I'll link back to you when I publish the card on my blog next week - it has to reach the recipient first :)
ReplyDeleteHugs
Di xx
Di again! I just published my card made using your brilliant instructions. Thanks again. Di xx
ReplyDeletethank you for making it look easy, I will give it a try, as got to make a card with them on for a little girl. Thank you so much for printing it all down for us to use.
ReplyDeleteReally brilliant. Been looking for something like this. I have just purchased the Stamping up Owl punch (sent to UK) Now I need to get going, so thank you for this idea.
ReplyDeleteMerci pour ce tuto, je vais justement à l'anniv d'une copine qui adore les minions ! biz
ReplyDelete